Thursday, April 5, 2007
Sanding
Friday, March 30, 2007
I've found that hearing protection and an Ipod (read sick jams) are critical to this phase in the build. While you can find a groove and become one with the sander, music helps immensely in attaining this groove. The sixer of Full Sail Amber Lager just adds fuel to the rock. I in no way condone operating power tools while drinking. Unless you're sanding for extended amounts of time. Then it's almost a necessity. Don't think for one second I won't sand like a madman while listening to CoC's "Heaven's Not Overflowing" or "Albatross". Don't you ever think that.
Sunday, March 25, 2007
Round Chine Stitching
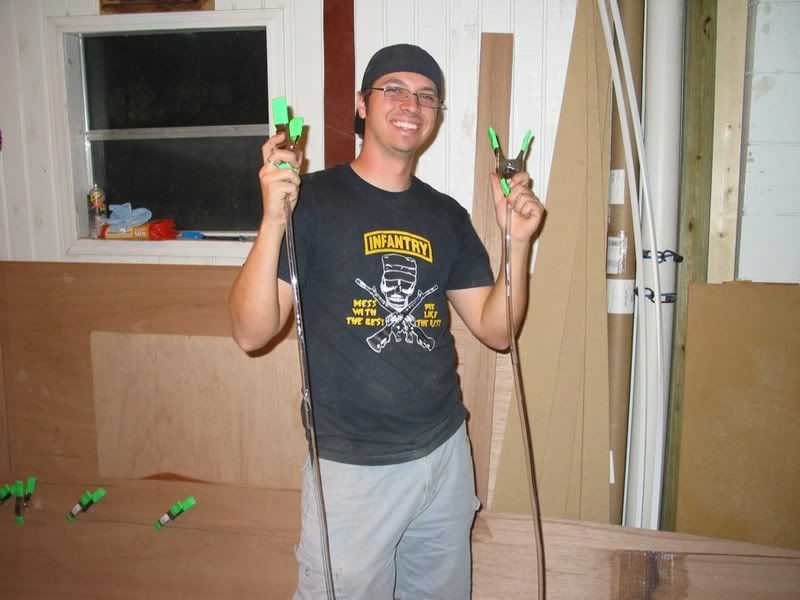
The chine begins to form pretty easily towards the middle of the boat. The closer you get to the bow, the more strips come into play and the more outrageous the amount of twist they are expected to take. Here's one side stitched up and the other loose.- A small section of PVC pipe behind the stitch can help keep things aligned. I found it useful to have 1/2" and 3/4" pieces as the different radii are useful in different situations.
- When cutting said pieces of PVC on a miter saw, use a blade with lots of teeth and wear eye protection. Or do like me: use the blade that came with the saw, close your eyes on each cut, and try not to let the shards of plastic death that fly out every 3rd or 4th cut bother you.
- When stitching, start at the point furthest from the bow. You only have to deal with a couple strips instead of 6.
- If things go out of whack, cut out the stitch and do it again. It's not going to get better.
- I put about 150 stitches in to the round chine and bow. I climbed under the boat for every one. Crawling in and out from under the boat over and over again will significantly lower your Rage Threshold. Walk away if necessary.
- Music is a necessity at this point. The stitching is tedium. I recommend punishing metal to match the mood of the endeavor.
- If you are going to do the round chine you absolutely cannot build on the decks like is recommended in the building notes.
Sunday, March 18, 2007
It's A Boat!!!!
Thursday, March 15, 2007
Strongback Part Deux
“Arrrgh. It be cold and dark in here, and all me mates be long dead and gone.”
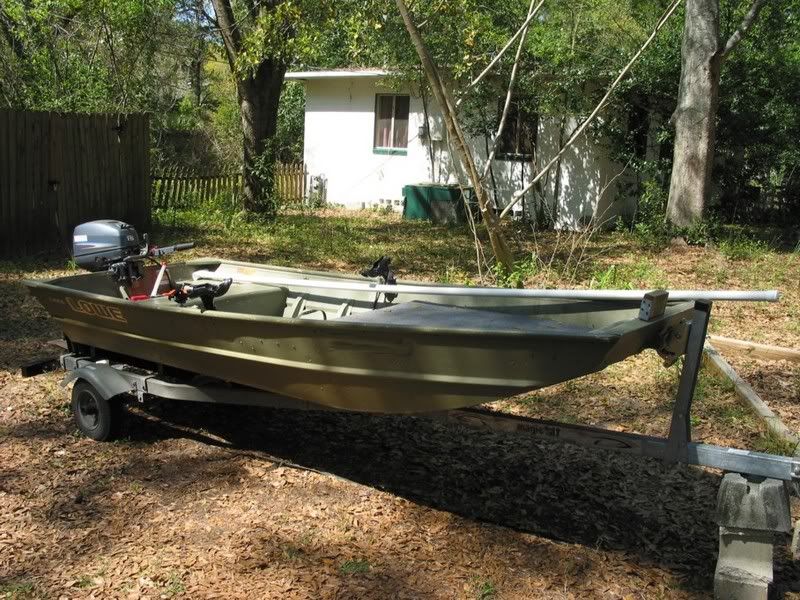
So back in the garage it was …….... right after we went fishing. I’ve been so consumed with the boat, that I had forgotten that it had been a couple months since I had last gone. So we took out my current boat, the “Hell Yes”, looking for anything that would bite. We had to run around to find the fish since it had been so long, but we caught a few. We each ended up with about 10 upper/over slot trout and one red. Half on fly, half of Exude jerkbaits. Cole’s red was a very pretty multi-spot about 24”. Mine was a rat that brought what we refer to as “the weak sauce.” The Hell Yes has been the perfect boat to learn the ropes where we fish in the Big Bend of Florida, but can’t quite do the kind of fishing we want to become good at. Hence the FS18. Since we’ve gotten into flyfishing, we need a boat that can creep up on reds in 4”-10” of water, where they tend to be pretty spooky. Since the HY is aluminum with a flat bow, it beats like a kettle drum when being pushed and it’s tough to get closer than 100’ to anything before it flees in terror. I can’t cast a flyline that far, definitely not with any accuracy. Some items will be transferred from the Hell Yes to the new boat, mainly the motor. The totally sweet bow mount for the trolling motor will not. Yeah, it’s pressure treated. Yeah, those are sheetrock screws. Feel the fury. Feel it.
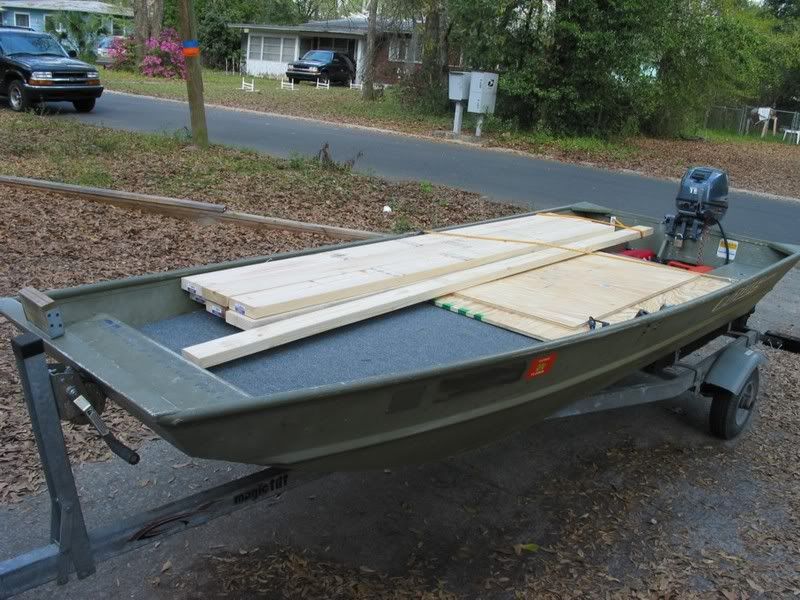
Watching red after red rocket off in fear as we got close to them was good motivation for the next days build. I needed dimensional lumber for the new strongback, but I don’t have a truck. This is when the Hell Yes forms like Voltron and goes into cargo mode. Its functions are many.
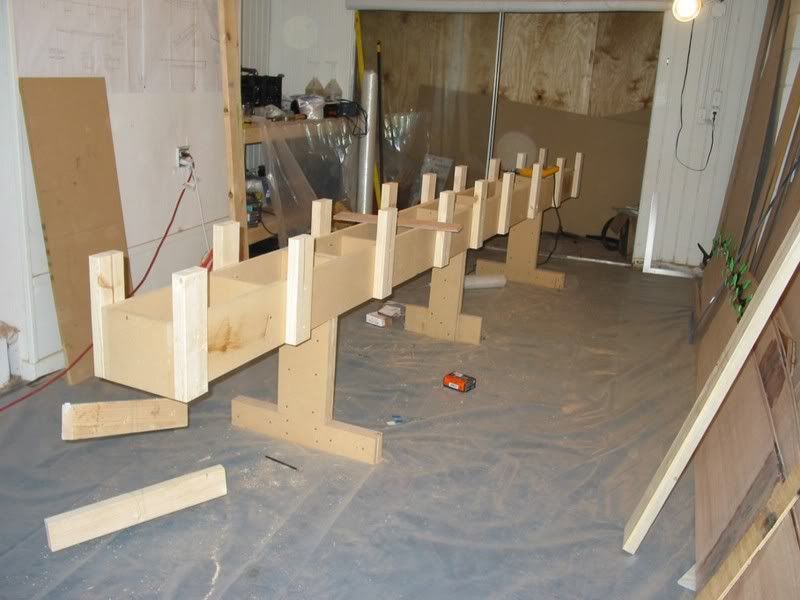
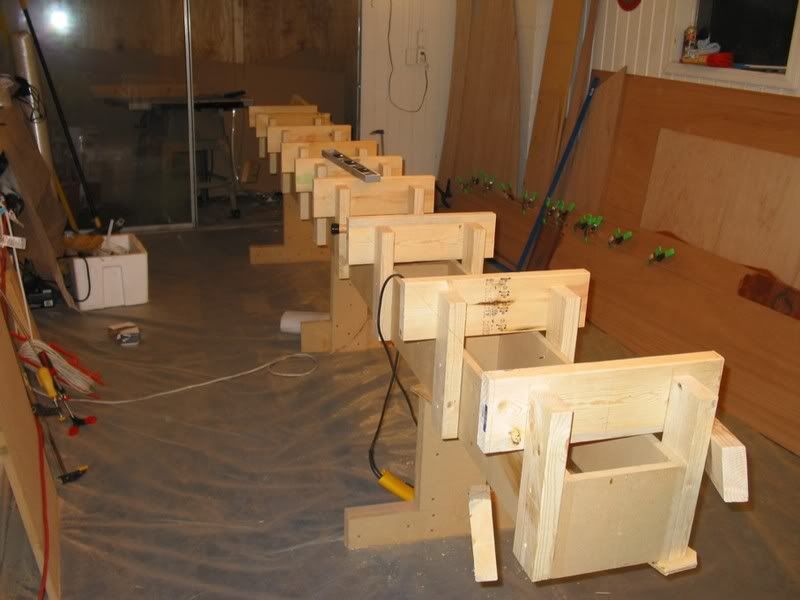
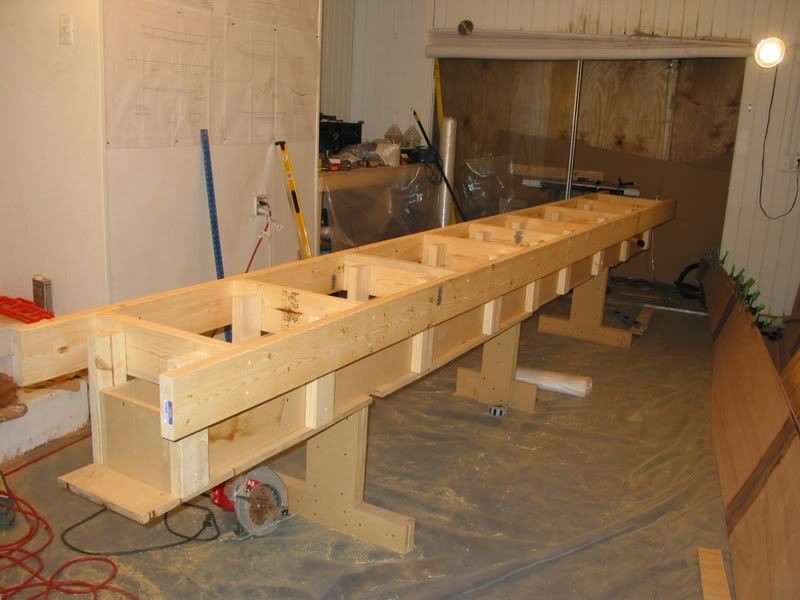
So began the somewhat arduous process of building a new strongback, one that is better suited to this build and more stable than the last version. Bayport Bob brought up a good point on his website that in order to construct the rounded chine, one needs access from inside the boat. This means that you can’t build on the decks like is suggested in the building notes. I basically am building a frame on top of the strongback, like Bob did, but am anchoring it down differently. First vertical supports were put on.
Then the first and last horizontal frame members were set up using a water level.
A line was pulled between the ends of these and all the middle framing was set up based on these lines.
Lastly, the perimeter frame members were attached to the horizontal framing.
Everything was checked with a level at each stage. It sounds reasonable, but took 2 days to complete, and Cole’s help made things much faster. I had to redo the whole process once when I realized that without the top, the strongback lacked the rigidity necessary to hold a boat. When I screwed supports to the underside, it knocked the thing out of wack and everything had to be realigned. I’m sure there is a more straightforward way to do this, but this is where my inexperience comes into play. It takes a lot of time to set it up this way, but I don’t really know any other way to make sure the base to build the boat on is a flat plane. I’m absolutely terrified that I’ll glass the thing together and then realize that one or more stations are wonky and my boat will look crazy. It would be best to avoid this. When I pull up to the ramp with this boat, I want people to say, “Hey, that’s a cool boat. Where’d you buy it?” Not, “Whoa man, what’s that? Did you BUILD that thing?” This setup will make double checking with a level possible when setting up the stations, which just makes me more confident. There’s a good chance some of the supports will have to be moved to attach the frames, but it is difficult to know exactly where the frames will go before you have the transom on. Actual boatbuilding this weekend. Rock.
Monday, March 5, 2007
Strongback
www.wetconcepts.com/FS18.htm
In fact, just use his website as a reference on how to build the boat and use mine for the witty comments from the Captain. Or to see the potential pitfalls of building the FS18.
Elie (trying to figure out how to get a sheet of ply to my house)
Sunday, March 4, 2007
Please Step Away from the Boat, Sir
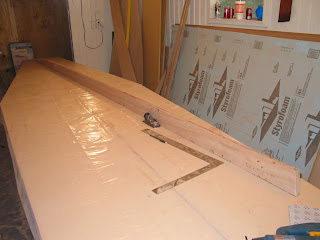
I figured since I evened up the stringers to one another, I might as well go ahead and do the same with the hull panels. They were nailed to each other and a combination of block plane, Surform and sander was used to cleanup all the edges. I was worried about how everything would line up, but it’s actually not bad. At one point I leaned down to really put some force behind the plane and planted my elbow squarely on one of the nails. Looking at it, I thought, “Man, I’m pretty sure that touched the bone.” As I cursed the weird, nervy pangs shooting up my arm, Captain Gnarly chuckled from above,
“Arrrgh, 'tis a wee scratch if ever I did see one. Do yur womanly places pain ye as well, me boy?”
Needless to say, I got back to the task at hand. Sometimes Cap’n G is a dick. The round chine option involves a few modifications to the bottom and side panels. The tip of each must be trimmed. Also the slits must be cut in the edges that will make the rounded chine possible. They consist of three cuts spaced an inch apart that follow the chine. This basically converts the chine area from standard stitch and glue to sheeted strip construction without having to deal with separate strips. I made a tool to draw the slits out with some scrap, duct tape, and a pencil.
As you can see, it's pretty advanced. Just set it at the depth you want and run it along the chine and you have a nice line to cut. The lines have a pretty serious curve to them and they must be cut perfect because they can’t be trimmed down later since they are internal to the panel. I was worried my full-size circular saw wouldn’t be able to handle the radius and was just all around too much saw, so I decided to cut them with my jigsaw.
This proved to be the biggest mistake I’ve made so far on the build. It’s tough for me to get an 8’ fair curve with the thing, and somehow I didn’t magically get better at using it just because the cut was more important. The cuts are embarrassing enough that I’m not even going to show a picture of them. They’ll show up in later pictures. Please don’t mock me. They look like they were cut by a drunken snake and then given a once over by a rabid beaver. I can’t wait until the outside is glassed if for no other reason than they won’t be seen anymore.
Having gone through all this, I figured I would cut out the temporary frames that fit where the cockpit will be. Easy right? Just lay them out, and cut them. Going over and over the dimensions for the middle frame, something wasn’t adding up. It kept coming up 1/8” off. Actually, throughout the build, I’ve had things come up 1/8” off in spots. While infuriating, I just chalked it up to my incompetence. Well, it turns out my big Swanson square is 1/8” off at the end. Awesome. Who knows how many spots are off in the boat?
I cut the notches in each frame to accept the stringer, but on dry assembly I realized that they are too shallow as depicted on the plans. I’ll need to measure to see by how much and then deepen the notches accordingly.
Deciding to wrap it up for the night, we figured we’d double check the strongback for level and square so we could be ready for framing Sunday morning. Somehow during the course of the build so far, it’s developed a 1/4” bow in the middle and about an equal amount of twist on the bow end. This would make for a nontriumphant boat that would probably porpoise like mad.
Having worked all day on a few hours sleep, I decided to do the rational thing and call it a night instead of cutting the strongback into many small pieces and setting them on fire in the front yard. This was my first and strongest inclination, and one that the Captain advocated fanatically.
Friday, March 2, 2007
Stringers
This was Cole's first time working with the epoxy, so I let him do the work while I mixed. First we precoated the parts.......
Revelations
So I think I’ve figured out the best way for me to get a high strength laminate with my materials. I’ve always found it a little counterintuitive, but the strongest fiberglass/wood bond is one that uses the least amount of epoxy to wet out the glass. Basically, you want the epoxy to glue the glass to the substrate, not have the glass suspended in an epoxy matrix that is on top of the substrate. Maintaining the proper orientation of the glass fibers in the cloth is also important, but if you can achieve a laminate that is 50% glass and 50% epoxy, you go a long way towards increasing the strength of your boat. This is something that is routinely done by professionals, but can be tough for a newbie like myself. There are different methods to get there. A lot of people will wet out the glass away from the boat on a plastic table, squeegee out the excess epoxy, and then move everything to the boat. Unfortunately, I don’t have the room for this. Others will precoat the wood with a thin coat of epoxy to stop it from absorbing the epoxy from the laminate and starving the glass. I tried this but the glass was still getting dry in spots and pulling away from the wood. The pros can throw a piece of glass on dry wood, correct for the amount of epoxy that will absorb into the wood, and get a badass laminate. Not a chance for me.
In addition to the glassing, I've learned a few other things so far.
I found out that a grinder is a perfectly reasonable tool when the sanding disc is coupled with the proper rubber backing plate. It goes from a wildly dangerous wood knife with high potential to eviscerate the user to an aggressive, but controllable way to remove material quickly. WHO KNEW?!!
I learned that if there is enough sanding dust in the air that you can smell it burning on the halogen lights, the dustbag on your sander is probably clogged.
I learned that even though it's just wood, Meranti dust HURTS when there is enough of it in your lungs. The oils in the stuff are mean. Respirators are your friend. The Captain refers to this condition as "that ol' Red Lung", something that he informed me should only be a concern for women and children, not real men.
That's it for now. I tried for a while to get a picture showing the differences in laminate quality, but it was an exercise in futility. It’s tough enough to see it with your eye, much less with a camera. All the panels are finished now. I’ll glue up the stringers tonight. I know none of this is very exciting without pictures, but I don’t have anything new to show yet. It’ll get more interesting soon. I promise.
Wednesday, February 28, 2007
Hull Panels
Sunday, February 25, 2007
Slow Progress
Once it was mixed, I used a notched spreader to cover the first layer of ply .......... about half way. Back to the blue toothepaste to make up a 12 oz. batch. Repeat process. When the three layers were laminated together, I put a piece of MDF with 3 trolling motor batteries on it on top. The idea is to try and eliminate some of the significant warping the plywood had when it arrived. I know the epoxy needs a gap to work and you shouldn't put too much weight on it, but it damn sure has a gap with the way my transom pieces are taco'ed up. I'm currently stressing out a little based on the fact that there wasn't much glue squeeze out from the edges of the piece. The Gel Magic is pretty thick, but the transom only holds the motor on the back of the boat. Just a minor piece. There's a transom under this mess somewhere.
By this point, I was able to flip the hull pieces and put another fiberglass splice on. I couldn't afford a belt sander, so I bought a cheap grinder with 36 grit discs to cut my trenches for the tape. Good lord, will a grinder kick a piece of plywood in the face! I'm far too unskilled to be using this tool for this application, but I am told it is useful for a lot of things later in the build. Once the trenches were cut, the application went smoothly now that I have a better idea of how much resin the tape needs.
Throughout the course of the day, any extra resin left in the pot was put on the hull panels. They'll all get coated eventually anyway.
So that's where it stands now. Half of the hull panels are assembled, and the transom is glued up. Two more hull panels and the stringers and I'll be ready to set up the frames on the strongback. Later on in the build, I'll have enough room, but I'm really wishing I had more right now. I would be further along on making these panels. Thus far, my saving grace has been how much working time these epoxies allow. I ordered slow hardener for the laminating resin, and I'm glad I did. It takes longer, but makes things less stressful. The Gel Magic definitely kicks off faster, but when it's spread out on a part it's not too bad.
Saturday, February 24, 2007
Finally Some Epoxy
After getting everything cut out, it was time to start glassing. Because I don't have enough room, I have to use the strongback as a laminating table to glue up all my long hull panels before I can set up all the frames for stitching. First I put down plastic, so I don't glue everything to the table.
Next I laid out everything that I would need to make each splice. A piece of 12 oz. biaxial tape cut to size and a sheet of plastic as poor man's peel ply.
Each joint was precoated with the Silvertip laminating resin. The glass tape was laid on and then resin forced into it with a paintbrush. Then the plastic sheeting was put on and smoothed as best as possible using both hands and a piece of PVC like a rolling pin. A curing splice looks like this.
This is where things stand after almost a full day of work. I would really like to reach a point where I can set up the frames and start stitching this week. A little more space would make this step much faster. Hopefully will have a new post tomorrow.
Friday, February 23, 2007
Quick Update
Expect more updates this weekend. Hope to make some progress.
Sunday, February 18, 2007
Getting Busy
Anyway, back to the build. In order to have something to cut the panels on, we went ahead and enlarged the strongback to support the decks of the FS18. Basically, its shape now crudely follows that of the boat and is wide enough to keep everything from drooping.
Once the patterns are laid out on the ply, we place them on top of a sheet of blue insulation foam and start cutting. We used a borrowed cordless circular saw for this. It's weak, runs out of batteries and the blade sucks, but its small diameter makes it well suited to cutting the sweeping curves in the panels. It gives a fairer curve that a jigsaw would.
The Captain got a new place to rest his weary bones today too. A test piece from when I was playing around with my trial epoxy kit just happened to fit him perfectly, so we attached it to the wall.