Monday, February 18, 2008
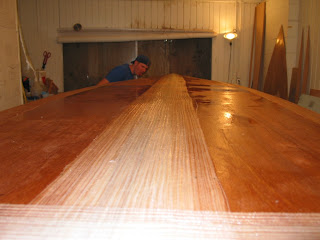
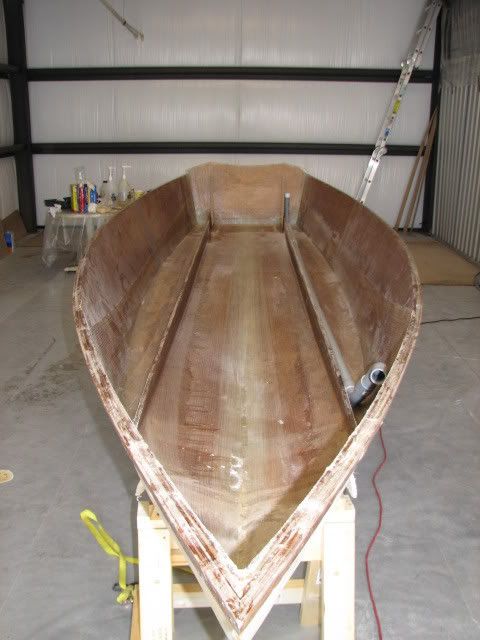
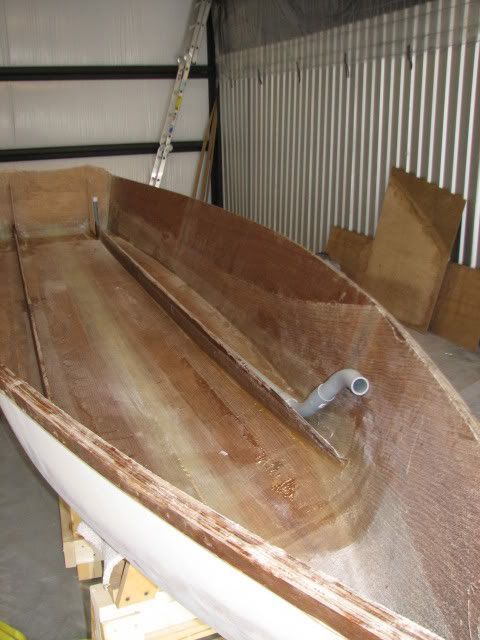
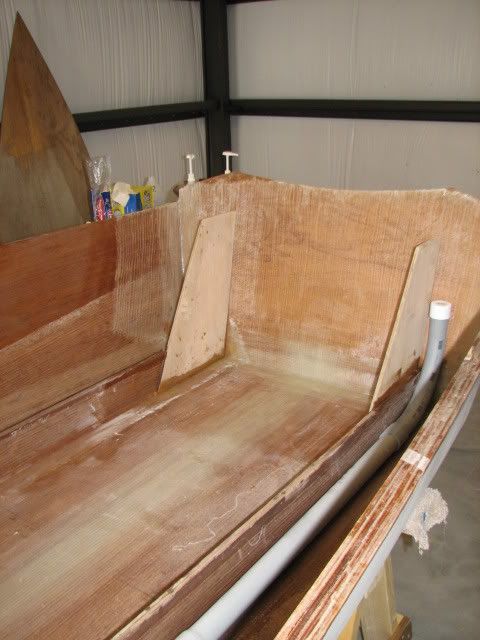
Stringers
Wednesday, December 5, 2007
New Build Space
About the space. Up until now, I had the boat in a spot next to my mom's house that was just too exposed to the weather for my tastes. Not that I've had time to work on it while we're adjusting to our new life/jobs/house/etc, but it got wet in the rain and was exposed to dirt and UV (UV breaks down unprotected epoxy for those not in the know). Fortunately, a spot at my dad's warehouses opened up and he let me have it for free. And by a spot, I mean a Cavern of Rock that laughs in my old garage's face and then steals its girlfriend.
I could build a 40' sportfisher in there. No more sucking in my gut and inching around the boat trying not to get epoxy all over the front of my shirt. Maybe I'll build a pocket bike track around the boat to keep occupied while epoxy sets.........

Yeah. Feel it.
Don't think that the Cap'n isn't still around either. He's been hanging out on my porch staring me in the face every time I leave to go to work in the morning. Displeased to say the least. Now he has a new perch to hurl insults down from.
Tuesday, July 31, 2007
Speed Testing
.....and my bike........
.......at the same time!!!
I have successfully moved the boat to my mom's house in the Panhandle. No problems during transport, but a nerve wracking experience nonetheless. I had visions of all my hard work tumbling down the highway the whole time. It shifted a little during the move but not enough to be a problem. Everyone who has seen it so far has said that it's considerably larger than the impression that they got from this site. That's a good thing I guess. I was really lucky in that I didn't run into any rain on the whole 5 hour drive. If you've ever been to the area, you'll know that to drive anywhere along the Gulf Coast of Florida on a summer afternoon and not encounter torrential downpours rolling in from the water is a statistical anomaly. I was a little concerned with how well I had epoxy sealed all the wood, so I was glad it ended up being a non-issue.
The next few weeks will be devoted to packing, moving, unpacking, and settling in to the new house and new job. After all that is finished, I can start working on the boat again. So expect updates in a few weeks once everything has calmed down.
Elie
Saturday, July 28, 2007
Inside Glass
Precoated panels, fillets in place, overlapped tape on keel:
Chines taped:
12 oz. biaxial cloth laid out, cutting down centerline for the bow fold:
Frank of "Frank's Canoe" fame, me, and Matt, professional termite sorter:
Putting together the bow overlap.
No real pictures of the glassing process. We used the squeegees primarily, and it worked out great. Prior to starting today, I cinched the the ratchet straps down on the frames and measured the width at each one. This way when we were done glassing I would know how much to pull the sides in even though the frames had been removed. Hopefully, this will help me get the shape I want when it's time to put the frames back in.
I differed from the plans a little and ran the cloth all the way up the transom. I probably could have glued together my transom sandwich a little better when I started, so I figured this couldn't hurt.
I'm pumped about how the inside laminate has turned out. It looks great. I can't thank Frank and Matt enough. I couldn't have finished this on my own today and I HAVE to get this thing out of here tomorrow. My jackbag of a landlord is going back on his word and kicking us out a week early. Gotta get moving. Thanks guys.
Elie
Saturday, July 21, 2007
The Flip!!!!
The only place where the boat was attached to the frames was the transom, so those screws came out and we were ready to pop it off the strongback. After remembering to disconnect the transom knees halfway through the move, Frank and I wrestled it out into the front yard. For what it is, an 18 ft boat, it is amazingly light (maybe 100 lbs.) But with just the two of us trying to lift it over our heads to get it off the frames, it was a bear. I think I pulled something in my neck. It's still howling tonight after 2 BC's and 2 Sierra Nevada's.
Anyway, here she is in all her glory:
The truck and flatbed in the background are borrowed from my dad and will transport this Bad Larry to its new home in the Panhandle. It was still tough to get a great shot, but you can at least get a better idea of the lines. She just looks fast, being shaped a lot like what I think a boat tail rifle bullet looks like. The main task for the day was to make a cradle to affix to the strongback to hold the flipped boat. This is the kind of thing that Frank is good at and he took the lead on the design. In short order, we had 4 cradles to match the hull.
Some scrap carpet and trimming of the ends of the cradles and they were ready to screw to the strongback. In the flipped boat, you may be able to see where I marked the locations of all the interior pieces while it was still on the frames.
While most people will keep the whole stringer/frames assembly intact, flip it and put it back in the boat, I don't have room to do that. I broke down all the frames and stringers and stacked them to the side, so I need to know the exact locations of everything I took out, so I can later put them back in.
The cradles we made held the boat well, but the strongback was now way to high to get into the interior to do the next glassing step. The boat came back off and some very bootleg engineering brought the whole assembly to a more reasonable height.
Yes, my shop is an embarrassing mess. This is standard and I think goes well with the hurricane damage hole in the ceiling. Have to get it cleaned before the next big glassing party. Like I mentioned before, one problem that I noticed when we test fitted the frames was that with the force of the rubrail bowing it out the whole thing has sort of opened like a book in the middle, pulling the sides away from the frames. This has been exacerbated by the flip because the weight of the sides pulling down now make it worse. With some ratchet straps cinching it together at the frames, it has all came together beautifully though. Dealing with the straps will be impossible when we glass, so we'll make some presized braces based on the current beam that will pull the sides in right after we do the inside (thanks for the tip Bob). With the glass still wet, we hope this will help in retaining the proper shape.
I have to say that I'm proud of myself today. After months of sanding, today it hit me, I'm actually building a freaking boat. For the first time, I feel like fishing out of this thing is in the forseeable future. Sweet. I think I'll go have another beer. Cheers everyone.
Elie
Sunday, July 15, 2007
Rubrail - Part 1
Like I mentioned before, it's time to get the Spook ready to make the haul up to the Panhandle. So I called Frank over to help me rip half a sheet of 1/4" ply into 1 1/2" strips. My new Freud blade worked like a charm. Unfortunately, on the last strip, the bearing in the saw decided to try to catch on fire. Epoxy dust from all the sanding I've been doing probably got in there, and that's a death sentence.
Since I don't have any room to work, I had to turn the boat into my lamination table by covering it in plastic. I then laid out the first round of strips that I had prefitted to the boat earlier. Following the lead of some other builders, when the strips were prefitted on the boat, I drilled a few 1/4" holes through each one. These would later be fitted with dowels in order to align the strips when they were slippery with glue. Next, I precoated the inside face of the strips, the edge of the hull, and the dowels with straight epoxy. Here's the setup.
I've been scrounging clamps for about a year so I was ready for this moment, and I used every damn one of them. I could have used about 10 more. Once the precoat was tacky, I mixed up a batch of Gel Magic. I measured it by weight this time and things went much more smoothly. I slathered it on each strip and then used a notched spreader to even things out. Being the middle of July in Florida, temperatures inside the garage border on preposterous. I mixed up enough Gel Magic to do one strip on each side. If you get it on the strips quick, and don't let it spend much time in the pot, you can do two strips at a time. Barely.
Applying the strips is tricky. The dowels are tough to pound into a slippery strip of ply. And then pound into the side of the hull, all while trying not to get the glue on the faired surfaces. Once the dowels are in, you're golden though. I couldn't take pictures of the process, but suffice it to say, it's messy and nerve wracking. Here are some pics of the finished result.
One of the bow strips requires both a miter and a bevel for them to butt up properly. You can see it in this closeup, as well as a couple of the dowels. Dowels and bow will be trimmed up tomorrow and then the whole process will be repeated again. And then again, for three layers total.
Sunday, July 8, 2007
Still Fairing
I’ve had a lot of comments recently, all basically amounting to, “I’m tired of looking at that damn fly. Put up a report.” So, I’ll give you guys what I’ve got ……. and what I’ve got is fairing. The bow seam and transom edges need some work, but otherwise the whole boat now has a rough fair on it. By this I mean that all surfaces have had at least 2 coats of Quickfair pulled on and then sanded off with the random orbit. This has eliminated pretty much all fiberglass edges and smoothed out the majority of the big imperfections. It's tough to tell because of the patchy color, but it's all pretty smooth.
It's tough to get a good pic of the boat in it's entirety in the small work space. I'll make sure to take lots of pictures when we flip it. What remains is work on the bow and transom, filling a slight dip where the hull panels were spliced together, longboarding the crap out of the whole thing, and then putting a slight radius on all the hard edges. But all that has to wait. I'm about to get the hell out of the bum-ridden crimefest
I wish I were progressing faster, but fairing is a slow process and things have been totally hectic recently. It’s definitely one of those things that you just have to do an hour or two at a time and trust that you’re making progress because nothing obvious is getting done. I have had a lot of things take precedence over the boat in the past few months. I'm trying to get all my loose ends tied up here. Cole moved to P-cola, so he and I took one last fishing trip before he left, down to Sanibel in search of our first snook, especially on the fly. We had limited success but a good time. Some faces were rocked. We reached the conclusion that snook are awesome and we would like to catch more of them. Check out Cole’s report on his website in the side bar. Between that, trying to pack the house up, finding a place to live in the Panhandle, and ramped up intensity in the lab, making progress on the boat has been and will continue to be a challenge. Posts may be infrequent until I get settled in August, but I’ll do my best.
Wednesday, May 9, 2007
A Fly in the Ointment
Frank finally finished his cedar strip canoe and it's pretty sweet. For pictures, check out his website through the link in the sidebar.
I went out to trim up some half-cured Quickfair tonight and found this robber fly stuck to the hull, a victim of the fast curing fairing compound. These guys ambush other insects in midair, especially honeybees, drag them to the ground, and suck the life out of them. Karma's a bitch sometimes, I guess.
Thursday, May 3, 2007
I also have been squaring up the chines on the back 2/3 of the boat. They had to be rounded over for the glass to take the bend but the boat should corner better with a harder chine.
The bow curve wasn't very fair and I wanted a slightly less canoe look up there. Again, it needs more work, but it's getting there.Too put it bluntly, fairing is miserable. It has to been done manually, which is agonizingly slow, and I'm not real clear that I'm even doing it the right way. I have a long, long, long way to go on this. Keep plugging I guess. All the previous steps were short enough that the next new thing was just around the corner. Not here. It's tedious. This is where a lot of people give up on the project. I can't though. When I sit on the couch, the thing mocks me from the garage. "I can hear you in there, Elie. Come finish me. You'll never catch another redfish on that flyrod if you don't finish me. You know who doesn't finish boats, don't you? Hippies, that's who. You're not a hippy, are you? ARE YOU?"
Damn boat. On a positive note, Clutch has created what might be the ultimate boat building music in their new album, "From Beale Street to Oblivion". Songs about giving O'l Scratch the boot. Check. Songs making fun of vegan bike punks. Check. A song called Mr. Shiny Cadillackness. Check. Bluesy yet totally ass-rocking. Chiggity-check. Cole burned it for me and it's my current fairing music.
Also, there is a new website dedicated to the class of boat I'm building. It's called www.microskiff.com . They had a get together last weekend that I went to and got a lot of advice on setup from people who fish these boats every weekend. It was a great experience. Many thanks to all the people I talked to. I also got to spend most of the day on the bow of a Hell's Bay Whipray (Thanks Jason). What a sweet skiff. Anyone out there who wants to trade a Whipray for a partially faired FS18 hull, please contact me. I think we may be able to work something out. Didn't have a whole lot of luck with reds though. Spooked several hundred, but only managed two this size.
Thursday, April 19, 2007
Quick Fairing Update
Friday, April 13, 2007
The Fairing Begins
In places the weave didn't fill in completely, but the peel ply did smooth things out nicely and sucked excess epoxy out of areas where we'd put too much. Places where the weave didn't fill in all the way looked like this.
First thing to do was a quick pass with the sander to open up all the little pockets a little bit. This is my current setup.
The shop vac really eliminates most of the dust, makes your sandpaper last longer, and in this case, kept all the little holes from getting filled with sanding dust. A little information for the uninitiated: surpassing the previous champions, diamonds and a mid-90's Phil Anselmo, epoxy without any fillers is officially the hardest thing in the world. It laughs in 60-grit's face. But a little bit of time last night and I had the weave opened up a little.
The peel ply really did suck things down pretty well because if I sand just a little below the surface, I start hitting glass. Next, I mixed up a very thin fairing compound. A mixture of phenolic microballoons and silica is added to the normal laminating resin to thicken it to the consistency of runny ketchup. I smeared this all over the hulh with a spreader, making sure to make some of the passes in the direction of the weave. The purple color is from the microballoons.
The mix was made so thin so it would settle down into the weave and it worked great. It's tough to capture in a picture, but the weave filled most of the way in, with very few of the pinholes that indicate a bubble was trapped inside.
I have a ton of sanding to do on the sides of the boat and around the transom. The peel ply made a mess in these areas. I already hit them with a paint scraper, so that should cut down on time a little. I'll fill the weave on the sides and then probably switch from the microballoon mix to Quickfair. This is a Silvertip product that is basically like epoxy-based marine bondo. It's very thick, cures in three hours, and sands like butter. It's also pretty expensive. I'm in the fairly common position of being both poor and fundamentally lazy. But to me, it's entirely worth it to spend an extra $50-100 on the hull if it will save me hours of sanding time. I haven't even started the real fairing yet and I already detest sanding. I have to admit that the idea of the amount of work I'm going to have to do to get this ready for primer is a little overwhelming. I let it rest for a few days to try and relax but everytime I do that all I think about is how I'm going to do the next step. The thing won't leave me alone. I'll just try and follow my plan of getting at least one thing done each day and I'm sure it will all come together.
Sunday, April 8, 2007
Bottom Glass
Right off the bat, the epoxy started flying. Frank has to developed a pretty burly allergy to the West epoxy he used on his canoe and didn't want to risk reacting to the Silvertip, so he was the designated mixer for the day.
For those paying attention: yes, that is a pubic louse on his shirt and yes, the tag line does say, "Crabs, the butterflies of love". The French term for crabs is papillon de amor (or something close to that), and that's what it means. We just call them crotch crickets. Entomologist humor is a unusual at best. These are the people I work with everyday. Yeah, I know.
With epoxy all over our hands, we didn't get pictures of every stage of the glassing, but we snapped a few every hour or so. First, the chines, keel, and edges of the transom are laid up with biaxial tape. There are 3 layers on the keel, 1 on the chine and, two on the transom.
- Frank mixed in a cup and poured into a disposable tupperware container that Cole was using.
- Cole slopped the epoxy onto the tape with a chip brush.
- After waiting to let the epoxy soak in I used a flexible spreader to move the epoxy around, force it into the glass, and make sure the fibers were oriented properly.
Gaining some confidence with the tape, we moved on to the sheet of bottom glass. This is the same material as the tape (12 oz. biax), but in a 50" wide section. We made something of a mess getting it straight on the sticky hull, but once on it laid out nice. We abandoned the brush with such a large area, and simply poured straight from the cup and used the spreaders to move the epoxy around. This glass soaks up a lot, so having a dedicated mix man is a huge time saver.
The area by the transom has a lot of overlapping layers of glass which makes it something of a bastard........
Before long we were finishing up at the bow. Once we finished every 6 feet or so, we would stop and put on a layer of 60" peel ply. I broke down and ordered some real peel ply and the stuff is awesome. It a polyester fabric. When pushed into the glass, excess epoxy bleeds through to its surface. It should eliminate most of the weave pattern in the final laminate, and help to keep the glass to epoxy ratio equal, making it stronger. What you're looking at in these pictures is the peel ply not the glass. When I pull the peel ply off tomorrow, the actual glass and epoxy should be pretty smooth with a matte finish ready to accept fairing compound. Let's just hope it comes off.
This is the first time in the build that I've been really pumped about how one of the building steps turned out, the first time I thought, "Man, we really kicked that one in the face." I couldn't be happier with the glasswork. I hope I still feel the same way when the peel ply comes off tomorrow. I'm tired. I'm going to bed... just as soon as I see if the epoxyis green enough to scrape out the runs.